Cloud Deployment
Info
This section is under review and will be updated soon.
We have provided a number of ways to run agent services build with the Open Autonomy framework across multiple different cloud providers.
The deployment has been implemented using a minimal distribution of Kubernetes to run as close to the bare metal as allowable.
This approach leads to a number of key benefits for node operators and infrastructure providers:
- No reliance upon an individual provider. We currently provide documentation coverage for both Digital Ocean and for Amazon Web Services (AWS).
- Lower costs compared to using a managed alternative.
- Easily portable across different cloud providers.
We have 3 deployment options available for external operators.
- Docker Compose: This approach is advised for beginners/less experienced users.
- Kubernetes Cluster: We provide full deployments for Kubernetes:
- Single Node - This deployment approach is recommended for individual applications.
- Multi Node - This deployment approach is recommended for more advanced users looking to running multiple agent nodes or applications.
Infrastructure deployment is handled by Terraform to ensure replicability across multiple providers whilst allowing external operators to configure the deployments to match their specific deployment requirements.
Kubernetes Cluster
Pre-requisites
We require a domain for our cluster. This allow us to route traffic to our cluster controller node. This is a pre-requisite of both Kubernetes based deployments, however the docker-compose deployment is able to skip this step.
The domain can be acquired from a domain registrar such as goDaddy. Most cloud providers also offer this as a service such as AWS. The key requirement is to be able to update the domain registrars nameserver (NS) records easily.
Install dependencies.
- Skaffold: Deployment Orchestration
- Kind: Local Cluster deployment and management.
- Kubectl: Kubernetes CLI tool.
- Docker: Container backend.
- Terraform: Infrastructure management as code.
Step-by-step Deployment Instructions
- Acquire the external operator code.
svn checkout https://github.com/valory-xyz/open-autonomy/trunk/infrastructure
cd infrastructure
Setup on Digital Ocean Cloud Provider
- We need to first create an authentication file to be used by terraform to create cloud resources. This can be done from the API Settings. Save this file within the root directory as
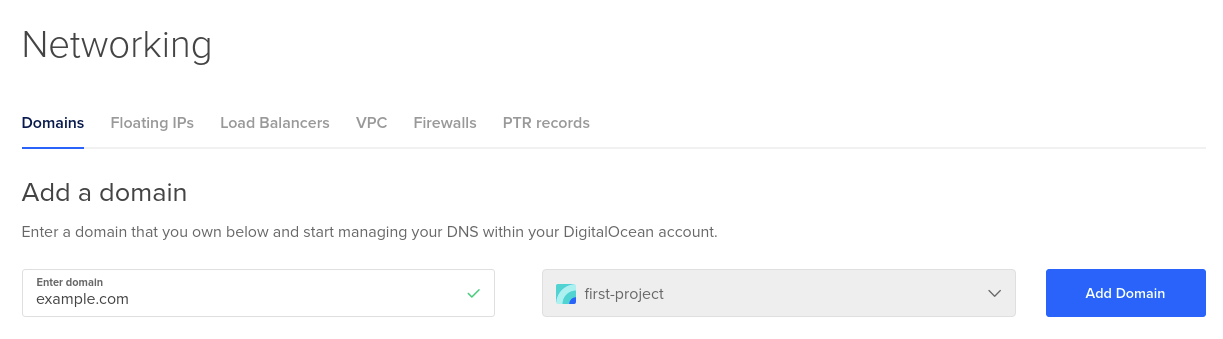
infrastructure/do_creds - Now we have our authentication token, we need to setup the domain we registered earlier. This is again done from the Network & Domains section of Digital Ocean.
-
Create a new domain by entering your domain
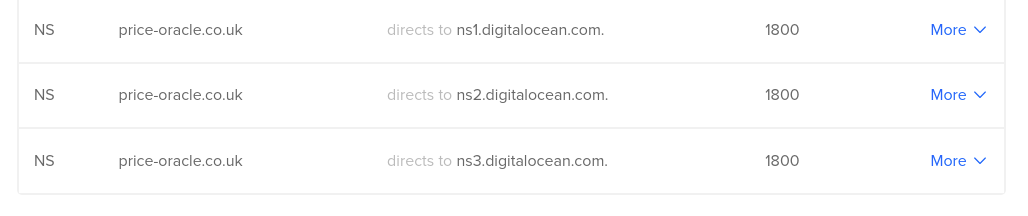
-
Once the domain has been setup on Digital Ocean, you will be provided with a list of Nameservers as so;
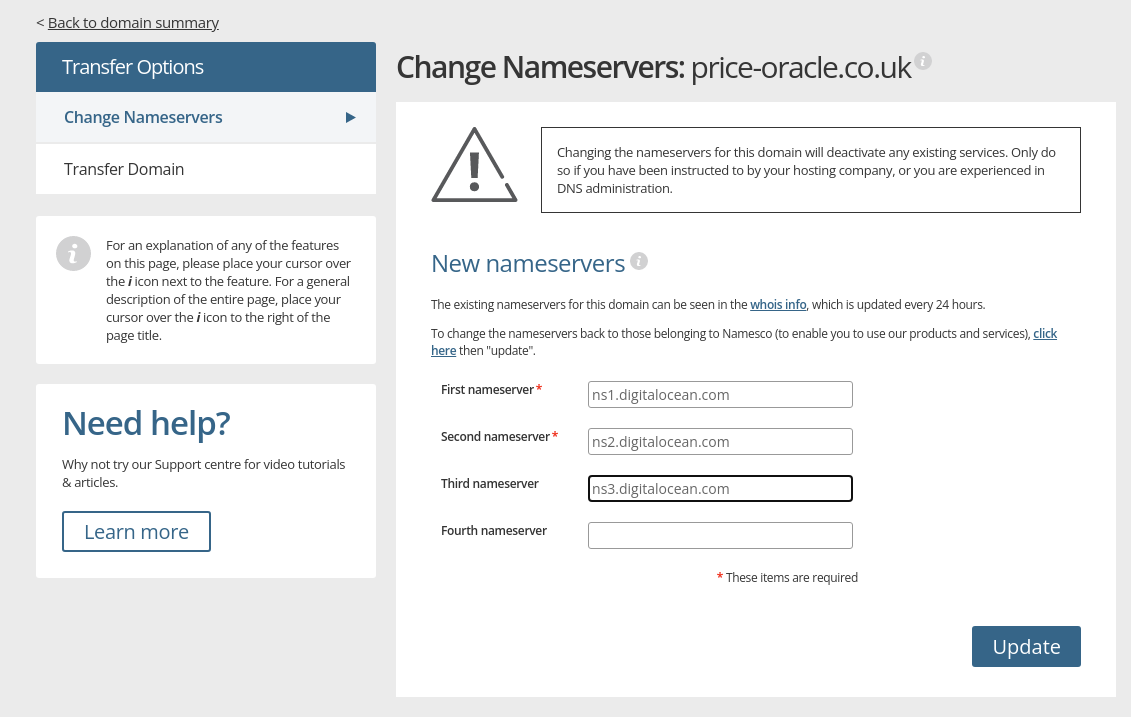
 You MUST configure your domain provider to point at these name servers like so;
-
Once you have completed these steps, you are now ready to deploy the cluster to the infrastructure.
This will generate a kubeconfig which can be used to interact with the newly deployed resources. NOTE. This provides root access to the cluster so ensure that it is protected.cd infrastructure/digital_ocean terraform init # download required terraform packages terraform apply # deploy resources and approve when prompted.
Setup on AWS
- Login to AWS console.
- Create a Hosted Zone.
- Use the Hosted Zones generated Nameservers to update the registrar with the correct Nameservers
- Create a service account
- Give the Service account the Dev-Ops Security group role
- create an access key and token and then save this file to;
infrastructure/aws_token - Once these steps are completed, the infrastructure can be deployed with;
cd infrastructure/aws
terraform init # download required terraform packages
terraform apply # deploy resources and approve when prompted.
Post Cluster Deployment Setup
Once the cluster has been deployed, we need to go ahead and actually deploy our application to the cluster. We have included a number of convenience commands to speed this process up.
Depending upon the Cloud Provider selected above, the user must now point their Kubectl at the newly deployed cluster as so;
export KUBECONFIG=$(pwd)/infrastructure/digital_ocean/kubefiles/kubeconfig
- deploy cluster permissions and a dashboard to view status
make cluster-setup - Create the deployment yamls
make cluster-create-deployments - deploy the yamls
make cluster-deploy - check the progress via the dashboard
make cluster-dashboard-start
This will print a URL along with a password to allow access to the kubernetes dashboard where you will be able to see the status of the running containers along with their logs.